Find the Best Garbage Disposal Service Companies for Your Business
No obligation • Fast responses • Nationwide coverage
Why you can trust Search a Plumber
Search a Plumber is a leading United States resource for finding and evaluating professional plumbing services. Our team researches licensing, experience, and customer feedback to create unbiased, fact-driven overviews. Companies cannot pay to change ratings or placement, ensuring homeowners get trustworthy information.
Search providers near you
Top Garbage Disposal Service Companies in Weston, Florida Ranked
A functioning garbage disposal is a modern kitchen essential, quietly grinding up food waste and keeping your sink clear. When it fails or needs an upgrade, it can disrupt your daily routine. Whether you're dealing with a jammed unit, a persistent leak, or planning a new installation, understanding your options for professional repair and installation services in Weston is key. This guide will help you navigate the process, from choosing the right unit to finding a qualified local expert to handle the job safely and efficiently.
Sparky Plumbing
4839 Pembroke Rd, Hollywood, FL 33021
Sparky Plumbing provides a wide range of plumbing services in Miami, FL, serving both residential and commercial clients. Their offerings include sewer camera inspections, water heater installation and repair, drain cleaning, leak detection, repiping, gas line installation, and fixture upgrades. They specialize in trenchless sewer repair and use advanced tools for sewer line inspection and repairs to minimize disruption. Sparky Plumbing also offers 24/7 emergency plumbing services to address urgent issues at any time.
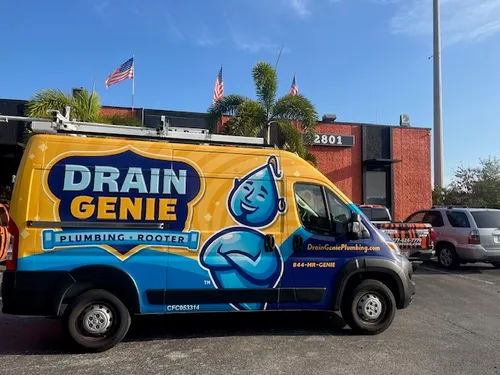
Drain Genie Plumbing Services
Miami, FL
Drain Genie Plumbing Services provides a wide range of plumbing solutions in Miami, FL. Their services include sewer camera inspections, water heater repair and installation, sump pump repair, drain cleaning, sewer line repair, leak detection, repiping, gas line installation, toilet repair, and garbage disposal repair. They use advanced technology such as video camera inspection and pressure testing for leak detection to address hidden leaks effectively. The company offers 24/7 emergency plumbing services to handle urgent issues like burst pipes, sewage backups, gas leaks, and failed sump pumps, ensuring prompt response and minimizing property damage.
Asap Plumbing Repairs
3951 SW 41st St, West Park, FL 33023
Asap Plumbing Repairs is a plumbing service provider based in Miami, FL, offering a wide range of plumbing repairs and maintenance. Their services include sump pump repair, drain cleaning, hydro jetting, leak detection, garbage disposal repair, and more. They serve all counties in South Florida, including Miami-Dade, Broward, and Palm Beach counties. The company provides 24/7 emergency plumbing services to address urgent water and plumbing issues at any time. One of their key capabilities is hydro jetting, which helps clear clogged drains effectively. Asap Plumbing Repairs emphasizes local expertise and offers reliable service backed by experienced plumbers who care about their customers' needs.
AAAPLUMBINGSERVICES COM
1000 5th St #200, Miami Beach, FL 33139
AAAPLUMBINGSERVICES COM provides a wide range of plumbing services in Miami, FL, including water heater repair and installation, tankless water heater services, drain cleaning, toilet and garbage disposal repairs, and trenchless sewer repair. The company uses trenchless technology for subsurface construction work and services both residential and commercial clients. Established in 2001, AAAPLUMBINGSERVICES COM has licensed and certified technicians who handle various plumbing needs with a focus on quality and customer satisfaction.
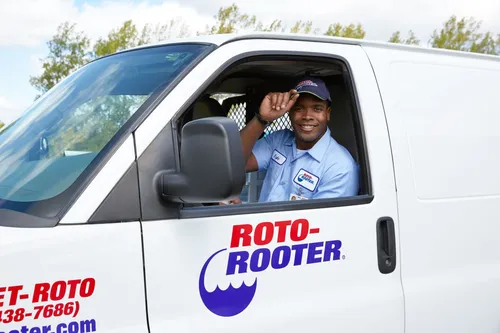
Roto-Rooter Plumbing & Water Cleanup
6754 Pines Blvd #202B, Pembroke Pines, FL 33024
Roto-Rooter Plumbing & Water Cleanup provides comprehensive plumbing services in Miami, FL, specializing in residential and commercial plumbing solutions. Their expertise includes sewer line repair and replacement, drain cleaning, water heater installation and repair, leak detection, gas line installation, and floodwater cleanup. They use advanced tools such as video camera inspections and offer trenchless sewer repair methods to minimize disruption. Roto-Rooter serves a broad area including Pembroke Pines and surrounding communities. The company operates 24/7 to handle emergency plumbing needs, ensuring prompt response to urgent issues like burst pipes and sewer backups.
Understanding Your Garbage Disposal Options
Before calling a professional, it helps to know what kind of disposal unit is right for your Weston home. Disposals are primarily categorized by motor power, measured in horsepower (HP). The most common residential units range from 1/3 HP to 1 HP. A basic 1/3 HP model may suffice for light, occasional use, but most households benefit from a 1/2 HP unit for general daily tasks. For families that cook frequently or deal with tougher food waste, a 3/4 HP model offers more grinding power. High-demand kitchens might consider a 1 HP unit, which can handle heavier loads and reduce the likelihood of jams 1. These units typically operate on a standard 120V circuit, but proper electrical wiring and a dedicated circuit are important safety considerations a professional can assess.
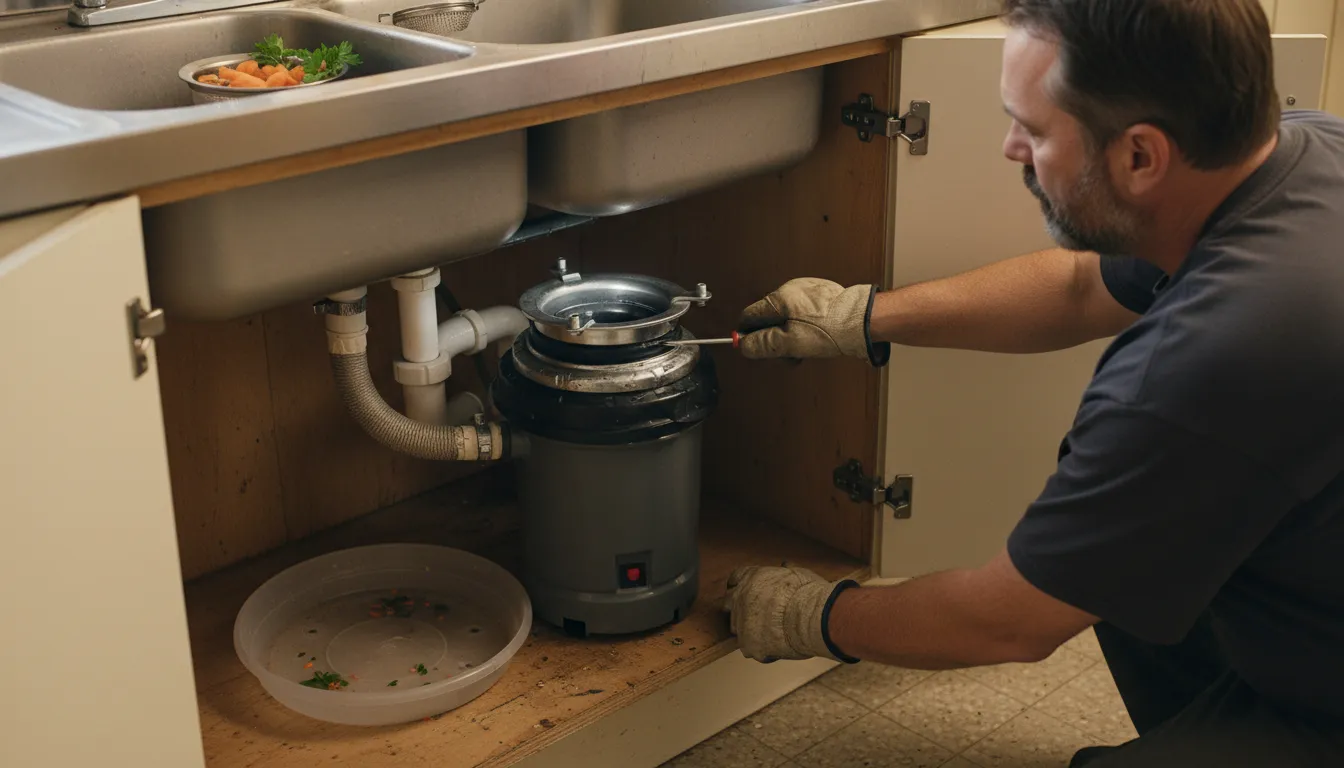
The Professional Installation Process
While a handy homeowner might attempt a DIY installation, the process involves both plumbing and electrical work, making it a job best suited for a licensed professional. Here's what a typical professional installation or replacement in Weston entails:
Safety and Preparation: The technician will always start by shutting off power at the circuit breaker and the water supply to the sink for safety.
Removal of the Old Unit: If replacing an existing disposal, the old unit is disconnected from the drain pipes, the electrical wiring, and unmounted from the sink assembly.
Sink Flange Preparation: For a new installation, plumber's putty is applied around the new sink flange, which is then inserted into the drain hole and secured from underneath with a snap ring.
Mounting the New Disposal: The mounting assembly is attached to the sink flange. The new disposal unit is then aligned and twisted into place, locking securely onto the mounting bracket.
Connecting Plumbing and Electrical: The discharge pipe from the disposal is connected to the existing drain pipe and P-trap. If applicable, the dishwasher drain hose is connected to the disposal's inlet port. Finally, the electrical wires (black, white, and ground) are connected, and the wire cover is secured.
Testing and Inspection: Once installed, the power and water are restored. The professional will run water and test the unit to ensure it operates correctly and check all connections for leaks 2. This entire process for a standard replacement typically takes a professional 1 to 2 hours 3.
Key Considerations for a Successful Installation
A smooth installation depends on a few key factors. First is under-sink space; there must be adequate room for the disposal's size and clearance for the drain pipes 4 5. Drain alignment is critical; the disposal's outlet must line up properly with the existing drain pipe to avoid awkward bends that can cause clogs 6. If you have a dishwasher, its drain line must connect to a dedicated inlet port on the disposal, which not all models have 4. Finally, every installation requires a P-trap between the disposal's discharge and the wall drain to prevent sewer gases from entering the home 6.
Repair vs. Replacement: Making the Right Call
Not every disposal problem requires a brand-new unit. Common issues like jams, leaks, or humming without spinning can often be repaired. A professional can often free a jam by manually turning the motor with an Allen wrench, reseal a leaking connection, or replace a worn impeller. However, if your unit is over 10 years old, requires frequent repairs, has a burned-out motor, or significant corrosion, replacement is usually more cost-effective. A technician can provide an honest assessment of whether repair is viable or if a new, more efficient model is the better long-term investment.
The Value of Professional Service
Hiring a licensed plumber or qualified technician for your garbage disposal work in Weston offers significant advantages. They ensure the job meets local building codes, which is crucial for both safety and home insurance. Professionals have the tools and expertise to handle unexpected complications, like corroded fittings or tricky electrical connections. They also guarantee their work, giving you peace of mind. While labor for a standard installation to an existing setup typically ranges from $100 to $200+, the total cost-including the unit-often falls between $200 and $400+ for a replacement 7 8 9. Many local services offer free, upfront quotes.
Find the perfect garbage disposal service companies for your needs
Get personalized recommendations and expert advice
Common Garbage Disposal Problems and Solutions
Understanding frequent issues can help you communicate effectively with a service provider:
- Jams: Often caused by fibrous foods (celery, corn husks) or non-food items. A pro can safely clear it and advise on proper use.
- Leaks: Can originate from the sink flange, drain pipes, or the unit's body. Identifying the source requires inspection.
- Humming but Not Grinding: Usually indicates a jam or a seized motor. Attempting to force it can cause more damage.
- Foul Odors: Caused by food debris buildup. Special cleaning or minor disassembly may be needed.
- Reset Button Tripping: Frequently a sign of an overloaded motor or an electrical issue that needs diagnosis.
Maintaining Your Garbage Disposal
To extend the life of your unit and minimize repairs, follow good maintenance practices. Always run cold water before, during, and after grinding to solidify fats and move waste through the pipes. Avoid putting fibrous vegetables, grease, coffee grounds, or eggshells down the disposal. Periodically clean it by grinding ice cubes or citrus peels. Never use chemical drain cleaners, as they can damage the seals and internal components.
Frequently asked questions
Sources
Footnotes
-
Do I Need to Hire a Plumber to Install a Garbage Disposal? - https://www.blazerservice.com/about-us/blog/2024/january/do-i-need-to-hire-a-plumber-to-install-a-garbage/ ↩
-
Garbage Disposal Installation - https://ftp.spaceneedle.com/book-search/mL2C35/601368/Garbage%20Disposal%20Installation.pdf ↩
-
Garbage Disposal Repair & Installation | San Mateo Plumber - https://promoplumbing.co/plumbing-services/garbage-disposal-repair-installation/ ↩
-
Step-by-Step Guide to Installing a Garbage Disposal (And ... - https://inletfl.com/step-by-step-guide-to-installing-a-garbage-disposal-and-when-to-call-a-pro/ ↩ ↩2
-
How to Install a Garbage Disposal - https://www.homedepot.com/c/ah/how-to-install-a-garbage-disposal/9ba683603be9fa5395fab902ddad881 ↩
-
How To Install a Garbage Disposal in 6 Easy Steps - Lowe's - https://www.lowes.com/n/how-to/install-a-garbage-disposal ↩ ↩2
-
Who Installs Garbage Disposals | Plumber or Electrician? - https://hallerent.com/blog/garbage-disposal-installation-plumber-or-electrician/ ↩
-
Garbage Disposal Installation Cost Guide - The Home Depot - https://www.homedepot.com/services/c/cost-install-garbage-disposal/357654922 ↩
-
Garbage Disposal Installation & Replacement - Cool Today - https://www.cooltoday.com/plumbing/garbage-disposal-installation ↩